Wednesday, February 29, 2012

These Have Pull Around Here

Hello all! I have a real quick reversible project for you. It's reversible because the inspiration can come from one side or the other; the hardware, or the furniture. Changing out knobs and pulls on tired, old or boring furniture can breathe new life into a piece, tie a room together, give it an updated look, or all of the above. 


Look! 


We bought a changing table for Gil and the knobs were boring black and only served a utilitarian purpose. I bought (3) different knobs for (6) knob locations from Anthropologie and transformed the table to a feature item. 


See! 


Also check out this blog I found for the same project: (okay, I copied the idea to post this from here) 


http://mulipuli.blogspot.com/2012/02/how-to-make-your-ikea-dresser-look.html


Shop! 
I have a sweet spot for www.Anthropologie.com. I wanted to show you some of the latest items they have in store. The Zinnia knob is too much for me to "handle"!!

Silhouetted Zinnia Knob
Sihouetted Zinnia Knob $8
Artist In Kiev Knob
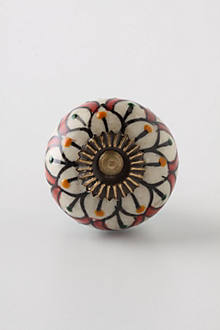
Artist in Kiev Knob $8
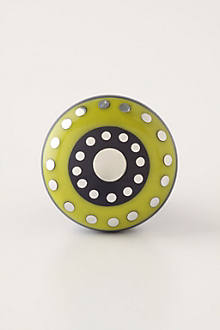
Zip-Dee-Doo Knob
Zip Dee Do Knob $8

Burnished Snail Knob
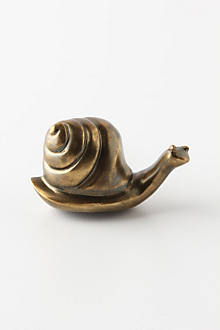
Burnished Snail Knob $12

Racing Stripes Knob
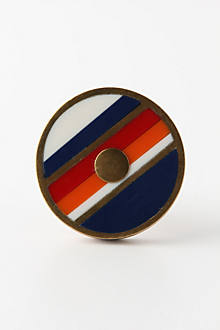
Racing Stripes Knob $24
Violette Knob
Violette Knob $8


Tuesday, February 28, 2012

The Writing's on the Wall

I have always loved words. They have gotten me far in life, you know? Seriously, why aren't there more words on our walls? There are about 5 million font styles and even more to say from each and every one of us. The best thing about this is that they are a complete, 100% reflection of you. You pick the words, the fonts, the medium and the sentiment. It doesn't just insinuate what you want to convey, it flat out tells you. Remember, words and letters are beautiful. 


This is in my train of thought for a few reasons. 


1. The previous post had a fantastic wall collage that worked in some scrawl and even went so far as to go outside the frame lines. Brilliant. 
2. We have a tiny laundry room. There isn't much that we can do with one of the walls, so I searched and I searched for a clever saying to purchase and post. My handwriting is not an option. It is terrible, and the sad part is, I took and paid for (mind you), a college course on Architectural Lettering. 
3. When I married Nate, we wanted to post a poem over some windows that he loved. 


"Eternity" - by William Blake


He who binds to himself a joy
Does the winged life destroy;
But he who kisses the joy as it flies
Lives in eternity's sun rise.


Now it's time we did something, or shall I say, put it in writing? 


Here are a few that I have found and loved and hopefully will inspire: 


Romantic writings 


Source: flickr.com via Jennifer on Pinterest


Moss. wow!  


Super Graphics. I am a fan. 


Source: flickr.com via K on Pinterest


With thumbtacks! 


Friday, February 24, 2012

Ohhh Fudge.

I screwed up. Maybe because I was trying to hang a picture at 7 am before work. Maybe because I was tired. Maybe it was meant to be. Yeah that. I tried to hang Grand Central Station, and obviously, it is WAY too  high. Darn. Here now, if my dilemma. My husband would kill me if I made Swiss Cheese out of the wall, and I wasn't so hot on just one picture perfectly centered and nicely house above a sideboard anyway. (so there.)

Here's my solution. Make Swiss Cheese another way. Collage time! I kept Grand Central and added and added and added. What I love about this is, that the wall is not in the "beaten path" of the home. You really have to be in the dining room to enjoy it. It's like a little treasure waiting for you. I have tons and tons of black and whites and I am happy with my composition of collages. (Read: I don't slap shit up and expect everyone to marvel)

Here is the result:


Don't mind the table, or the lack of color. I want to deign this room to be black, white and gray and then figure out a perfect color to make the room shine. To be announced...


Quick Tips on wall collages:

1. Collage frames don't have to match. The subject matter doesn't have to match. Somehow, HOWEVER, they have to relate. Scattering frames must read in a way that the frame edges align somehow, or there is a series, or color or some minute theme or idea, that may or may not be consciously perceptible.  It'll still look random, but the viewer won't be distracted with bad composition.

2. Lay out your collage on the floor first. Once you have your template, measure the distances between the frames and more importantly between the hardware on the back of the frame or media.

3. Don't limit your collage to just pictures in frames. You can add plates, multi media, art without frames, etc. The sky is the limit!

4. When working on your composition, after adding a piece, step back. Look at the "negative space". See what the blank space wants to have fill it. Something round, a portrait, a landscape shot, a series of something. Something small, something large, something sideways. You get the idea. Have it speak to you. 

5. Finally, measure thrice. Hammer the wall once. That one is for Nate.

Other people's fantastic wall collages:


Look at the top right corner, how the font runs out of the frame. Yum!
The painted on text and numbers on the bottom left. Great stuff!


Look at the randomness...or is it? This looks like the artist started with a few pictures in the center and filled vacant spaces throughout. They were not afraid to fill that wall!


Above: This is typically not my style, but it looks great. The artist used the colors pink and yellow to pull together this wall, which spills onto the bed. It's fun, clean and creative.
Below: The elements are arranged using the midpoints of adjacent frames or media.

Source: tumblr.com via Alexa on Pinterest

Wednesday, February 22, 2012

Ten things to help you out - Volume I

1. It's a water heater, not a hot water heater. Everyone says it. You don't heat hot water.

2. If you are hanging a series of pictures in an allegedly straight row, and one is off, use electrical tape on the lower hook to even it out. It'll give you about an 1/8" lift. If the picture is too high, cut or notch the back of the frame. It's better than re-hammering the wall. (I swear my husband counts my nailings from the other room)

3. Office Clips. In the world of "paperlessness" you may have extra clips laying around. Use them to seal food bags, whatever the size may be.

4. A garbage can can be anything that holds stuff. Think pottery, decorative boxes or umbrella cans or buckets. 

5. If your light switch plates or outlets don't look  flush to the wall, take the face plate off and tighten the screws to the actual electrical housing. It works everytime.

6. If you have no money, but hate your cabinet hardware, spray paint it. If you only have a few cabinets, you can face lift them by switching out the handles. $12-$20 goes a long way.

7. Never talk about Fight Club. Oops. Wrong list.

8. Toothpaste fills nail holes in the wall.

9. Baby oil shines up faucets in a pinch.

10. Toothpicks can fix an uneven door. Use it as a mini shim. Nate uses toothpicks for EVERYTHING, and he'd be happy to see this made the list.

Tuesday, February 21, 2012

Inspiration Made Me Do It

From time to time some days, I get spurts of inspiration that is spontaneous, and sometimes not. Since I am preggers, these moments usually make me well up and text something loving to my hubby or look at wedding pictures, or something sappy like that. I have been needing another black and white print for my collage and then BAM! The stars aligned, and with a pop and a fizz, I had and idea for a new wall hanging (or two).


It's so simple. 


First, I pinned this:
Source: etsy.com via Beth on Pinterest


I love it, but I wanted my own personal message. I thought and I thought. After a few brief minutes, some hand wringing and beard stroking (hey, I am pregnant, hair is everywhere) I got it! 


Back story:
My hubby and I hung out all the time when we were kids, and it was one of the fondest memories that I had. I couldn't have imagined "dating" him. At the time, I thought he was my buddy, how could I kiss him? Time went on and we drifted apart, and I missed him. I wished for him. I...loved him? So basically, I have loved him most of my life. Real love. Love that sometimes you hate that you are in, and sometimes wonder why you got so lucky. 


I jumped on AutoCAD and typed away...


Then I cut...


Then I was happy! 


I printed on recycled scrap paper too! 

..and I can never forget my littlest inspiration 


Monday, February 20, 2012

Free Project to a Good Home.

I am currently working on a wall collage, that I can't wait to share with you. I noticed that I needed something to fill a void on the wall, and I have also noticed that wall paper is tip toeing back into the home trends. I love wall paper, and I'd flush it back in personally if I could. I have a ton of simple frames, and have access to a lot of wall paper samples (in the commercial realm, we call it wall covering, "dahhhhling")

Here's what I did:

Can you tell I am desperate to use this somewhere?

Two 5x7 frames that I unearthed while unpacking

Take out the glass or acrylic and trace the size. Quick and easy.

 There.
And there.

(I think I need to straighten out the lower frame. oops!)
This project is great for the budget conscious, in need of something to fill a space, or add pattern, or perhaps pull in a color or theme or color and theme. I'd have loved to use fancy frames and paint them all purdy,  but in lieu of the "big picture", these worked for me. Now, to finish the collage wall so I can share it!

Total $$ : ZERO. If anything, the frames were about $2.00 each (maybe) from IKEA.
Total time: Less than 1 hour.

Tuesday, February 14, 2012

Quick Update!

The chair is waiting for the piano. Patiently.
Also notice the armiore in the right corner. Another project that I am very excited about.

 The dining area with our tiny table. A visual lesson on bad scale. It's the only table I have, and what I want to reaplce it is a barn wood rustic table. That'll take time.

 Our temporary living area. It's a start. One thing I will do soon, is paint the black coffee table to coordinate better with the room. I think it'll be ivory, but as the wind blows, my mind changes.
The Nursery. Gil loves it.

And a little glimpse outside...


Sheer Madness - Update

You have to love the creative process. (READ: You have to love indecisiveness)
I started Step one of the process of adding curtains to the living/dining area. I went to IKEA and bought the HEDDA BLAD curtains for $14.99/pair. They aren't very shear, in fact, and make more of statement both up close and far away. I also picked up curtain rods for $7.99 each there too. ($25.00/per window isn't shabby!) I got home and went to work. Here is the result:

 huh...Who woulda thought?


I love them the way the are. I don't think I need a valance here, so I'll save my crafting favor for later on for dear Dad. His birthday is coming up, after all.  I also considered waiting to add drapes in the dining area and perhaps, hold out on just (2) panels of the Anthropologie curtains that I love so dearly. That'll be a waiting game. If I have the money before they are all gone, it was meant to be. If not, I'll have another project on my hands.

Total project time (FYI):
Trip to IKEA - 1.5 hours.
Ironing and hemming curtains using "no sew" strips - 2.0 hours
Hanging hardware - 1 hour


"Mapping out" the kitchen cabinets

 I have been contemplating getting some heavy wrapping paper at Hobby Lobby to line our kitchen cabinet drawers all-the-while fearing that isn't going to last through the toddler years. Separately, I have been trying to figure out what to do with my 4'-0" x6'-0" outdated map of Mecklenburg County (where I live). I thought about lamp shades, wallpaper, framing it and the list goes on. Suddenly, sitting at my desk I thought.

LINE CABINETS WITH THE MAP.
Perfect!!!

Here's what you'll need:

A vinyl map. (think school maps that roll up and down)
*Most of you may not have access to a map like this, but think of other items in your home that you have that may be a good liner - (left over wall paper, book covers etc.)
spray glue
scissors or an exacto knife
Ruler 
laser level
measuring tape
drawers (ha-ha!)

It's as simple as this:
1.Count your drawers and measure them. Chances are, several are the same depth and width. Create a template for each size drawer with a piece of paper. (Yours will probably be a little less wrinkled. My, ehem, assistant is 15 months old)


2.Draw out the bottom measurements on the map.
Cut away.


3.Go to a well ventilated space and spray glue the backs of the map. (Do one at a time. Flimsy paper with adhesive on the back is not manageable en mass)

4.Smooth the map onto the bottom of the drawer. Carefully center it, and align in the front of the drawer holding the edges, then push out from the middle to the edges.

Before:


and the final product looks like this:


And they wipe down!

Thursday, February 9, 2012

Sheer Madness and the Curtain Conundrum

I suppose that since we will be living in the new house, we should have curtains or blinds or some sort of window treatments, huh? I'd like to take my time on all of the treatments to be able to add color where color is needed, or pattern in an otherwise static room, but the front of the house is a big fishbowl and needs some attention.

I started looking at treatments for our living room, which is 3 windows in the front of the house. Since we are short on dough, I figured I'd re-use rods that we already have, and not get the dream curtains that I want from Anthropologie.

I used my shortcomings to get a little creative. I need something special for cheap. within my budget. Thankfully, we have an IKEA here. (this statement will be repeated through this project) This room needs more. It needs more than panel curtains thrown up just to have privacy in the front. So, what to do? Call Dad. That's it!

I called home and asked my Mom if my Dad could make a wooden valance that I could paint gloss black. She said yes, of course, (that's how it works there) but told me that the wood used typically in wood window treatments such as these is not good *wood, so would not take a coat or 3 of paint well, unless we got really good wood (read: $$$). Well that's out, so I had to keep thinking. ( I still don't know if dear old dad knows he is making these yet.)

* The wood used as backer for window treatments is called Luan plywood. It's a strong and easy to work with board. It doesn't typically have the grains so prevalent as regular plywood has.

My design issues for this room are:

1. It's black, white and gray, without a lot of pattern or movement. I need that somewhere.
2. The room will be home to my baby grand piano, so the rest of the space needs to keep up with the style and the little bit of austerity that I posess.
3. I have it in my head that there will be a valence over the windows.
4. I need something kind of quick.

So here's what I came up with:
I'd soon buy the IKEA curtains shown here @ $14.99 a pair (!):

Then, to incorporate all of the list above, I'd add wall paper to the body of the valance. This will give me a little pattern and a whole lotta style. Some of you may be fundamentally against wall coverings, but I promise they can be great, perfect even. Hopefully, I can show you with this little project of mine.


The good thing about this too is, I can see the drapes up (which are sheers), then work the corresponding valance to perfectly compliment them. This is gonna be good. How do I know? I am not the one with the saw in my hand.

Monday, February 6, 2012

About a House - a list.

Here are some quick tips to think about, make you stay calm and sort through the information and issues that come with that key to the house...

1. THE HOUSE ISN'T PERFECT.
That's a good thing. There will be repairs. Just make notes on the ones you can do your self and the ones that most definitely will require an expert. 

2. IT CAN'T BE DONE IN ONE DAY.
I wish that I could have moved in and worked around the boxes and furniture to get it perfect all in one weekend. There will be projects. There will be priorities. There will be husbands that need to paint every surface of the house, including all the trim. (Nope, that's just me)

3. PACE YOURSELF.
Pick a room or a task to do per day. It is pretty rewarding to meet your goals day after day. It's gonna take time, and it'll certainly take love and patience and it'll show in the end. One day, you'll look up from the tool box and sea of sponges and sprays and see all the work you have done is finally paying off.

4. IT'S GONNA COST MONEY.
With the intitation of both homes I have owned (and still own - eesh), I am always surprised where the money goes. If you have never bought a home and you're scared of the down payment, don't be. Sometimes you need very little or nothing at all. The government is all about programs. 

What will cost you is the upstart and service of all these new and wonderful things you have. The gas company will cost you to come out to set up the service, the locksmith will set you back $200.00 to change your locks, which I recommend doing. The list goes on. Don't panic.

5. TRY IT!
To save money, you may want to give some home projects a try before hiring a professional. I have found that half of the repairs that needed to be done, I could do. First, read through the directions. If you don't have a tool required, or especially if you have ever heard of it, don't try it your self. I am in the process of changing out the guts of a toilet tank, and it's not that hard. I also install lighting. If you know me, this should scare you.

6. MAKE YOUR INSPECTION FILE YOUR LONG TERM "TO-DO" LIST.
Take your inspection report and make it a to- do list. Trust me, when you first read one, it'll scare the living crap out of you. You WILL be sure that the house will collapse in less than a week. It won't. Well, it probably won't. Just simply make a copy and go through it and cross out all of the items that do not need any attention. Take the remaining items and decide what you can do, and what needs to be done by a pro.

7. DON'T BE AFRAID TO ASK.
The first example I can think of is, when the gas guys came by to connect the stove, I asked them to look at a room that has no heat or air. The man was nice enough to go into the attic and check it out. He said it may be just a damper that's closed. This, at least gives me an idea where to start. It was free.
You may also have handy friends. I have very handy and strong friends, thankfully! Ask for help or opinions. The worst thing you can do is decide to self diagnose. Have you ever tried to do that on WebMD? It'll be about the same outcome. The world is ending.

8. IF AT FIRST YOU DON'T SUCCEED...
I am speaking about personal choices here. If it turns out your concept isn't as lustrous as you thought, change it. If that paint isn't quite right, change it. If that picture is just too low, move it up. If there is something in the scheme that bothers you, figure it out and revise it. It's that simple.

9. IT COULD BE WORSE.
Just remember that. Just believe that everything can be fixed. ...and also remember this photo. Be thankful that you weren't there.


I hope this list can be helpful to you and your well being.  A home is a project. If you love it, it'll love you. Chances are, you aren't the first person that has encountered such issues with a home. You are not alone here. Breathe deep and keep smiling!